Isometric art Lesson
LEARNER CONTEXT
Grades 9–12, introductory-level digital art students
Diverse learner population, including a high percentage of English Language Learners
School-based instructional setting
Primary tool: Adobe Illustrator
UNIT FOCUS:
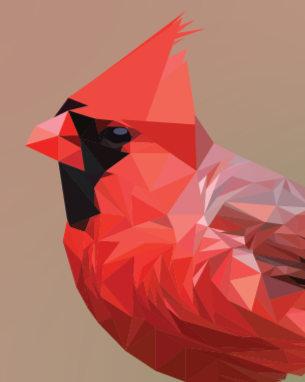
Students explore how shape, color, and light can be used to create the illusion of form through low-poly digital illustration, using Adobe Illustrator as a design tool.
cONCEPTUAL UNDERSTANDING
Low-poly art uses geometric shapes and color variation to represent form.
Light and shadow influence color value and perceived depth.
Artists use reference images to analyze form, light, and structure.
Digital tools shape both artistic process and outcomes.
Art-making is an iterative process involving planning, execution, and reflection.
ESSENTIAL QUESTIONS
How do color and shape define an object?
How does light affect the way we perceive form?
How do artists use reference images?
How does technology influence artistic process and decision-making?
TECHNICAL KNOWLEDGE AND SKILLS
Navigating the Adobe Illustrator interface
Using essential tools and shortcuts (selection, copy/paste, undo)
Working with layers
Creating and editing strokes and fills
Using the Pen Tool to construct polygons
Using the Eyedropper Tool to sample color
Identifying highlights and shadows in reference images
SEQUENCE:
Phase 1 — Visual Analysis & Concept Building
Examine examples of low-poly art alongside early 3D wireframe and game graphics
Discuss how technological limitations shaped visual style
Identify how artists use simplified geometry to communicate structure
Analyze animal reference images to locate major shapes, light, and shadow
Evaluate which images are suitable for low-poly translation
Phase 2 — Tool Orientation & Use
Download an Illustrator document
Review interface elements, layers, and workspace
Practice creating a closed shapes made with straight lines
Experiment with color, stokes and fill controls
Phase 3 — Shape Construction
Create a new Illustrator document
Use the Pen Tool to draw polygonal shapes
Break animal forms into geometric structures
Arrange shapes to define the underlying form
Phase 4 — Color & Value Application
Sample colors from their reference images
Apply color and adjust value to represent light and shadow
Refine color choices to improve depth and clarity
Phase 5 — Refinement & Evaluation
Revise shapes and colors for accuracy and readability
Compare their work to the reference image
Explain how shape, color, and value support the final image
Reflect on design choices and areas for improvement